Lets Party - Creating a Simple Ability
- Matt Boudreaux

In this tutorial, we'll walk through creating a very simple Ability and then playing it according to a button press. If this sounds, or looks daunting - don't worry. We'll take things very slow, step by step. Once you do it once, you'll be able to create your own Abilities in a matter of seconds.
Topics we'll cover include:
- Creating an Ability
- Using the Ability Editor
- Playing an Ability through Blueprint scripting.
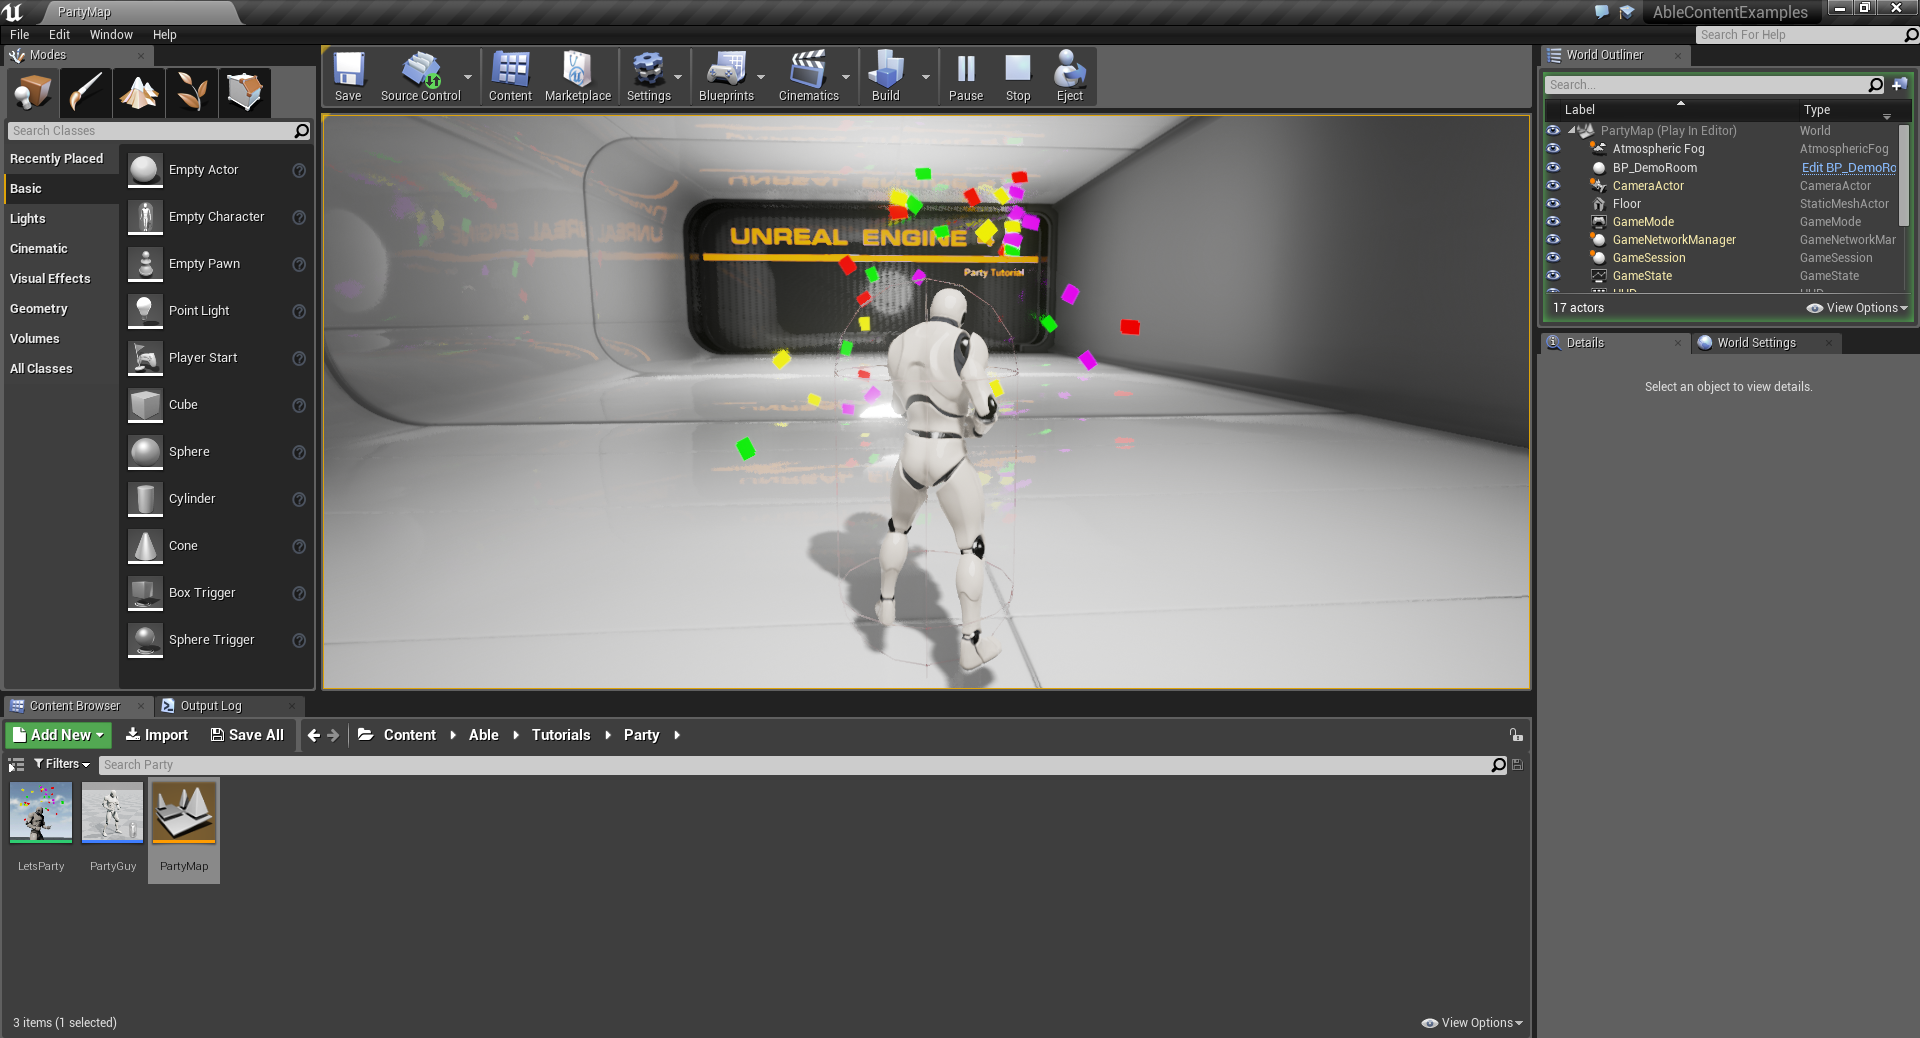
Our goal is to make an Ability, called LetsParty, that simply plays a confetti particle effect and a party horn sound. Let's go ahead and get started.

 Click to enlarge
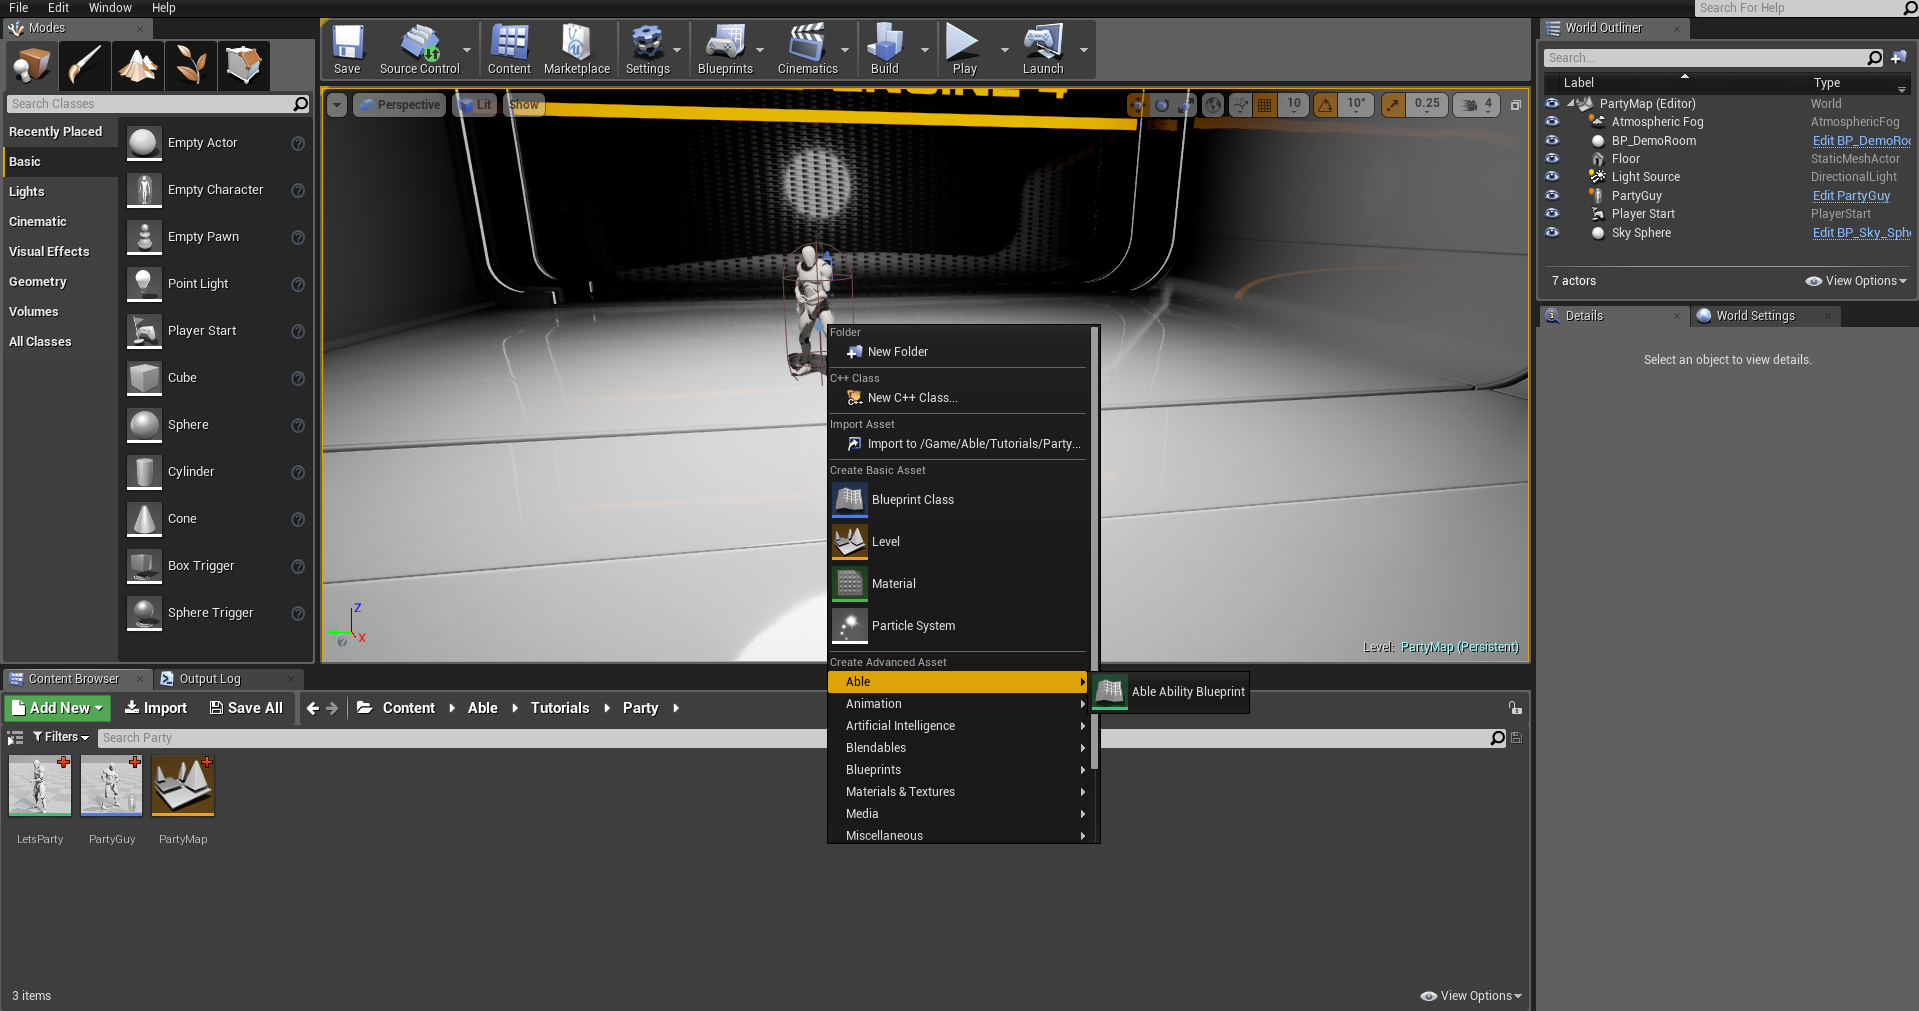
Our first task is to create a new blank Ability. To do that, simply right-click in your Content Browser and select Able > Able Ability Blueprint

 Click to enlarge
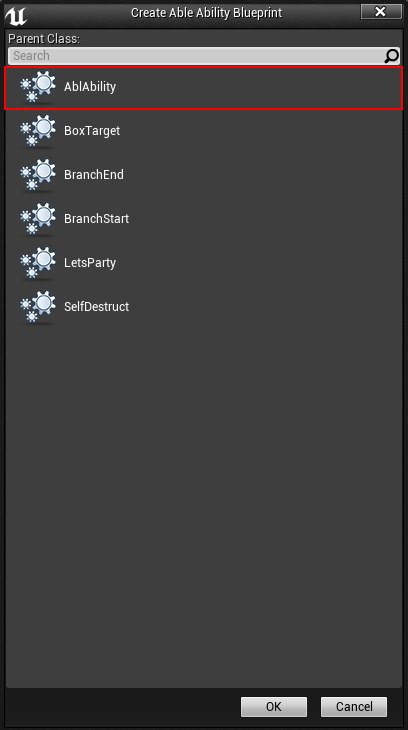
When you create a new Ability, the system will ask you for a Parent class to base the Ability on. You can see a list of all your current Abilities you have, but normally you'll just inherit from the default class which is AblAbility
This means we want an Ability with no existing Blueprint logic/functionality. We simply want a blank slate.
Once you've selected your parent, hit OK, and give your Ability a name (i.e. LetsParty).

 Click to enlarge
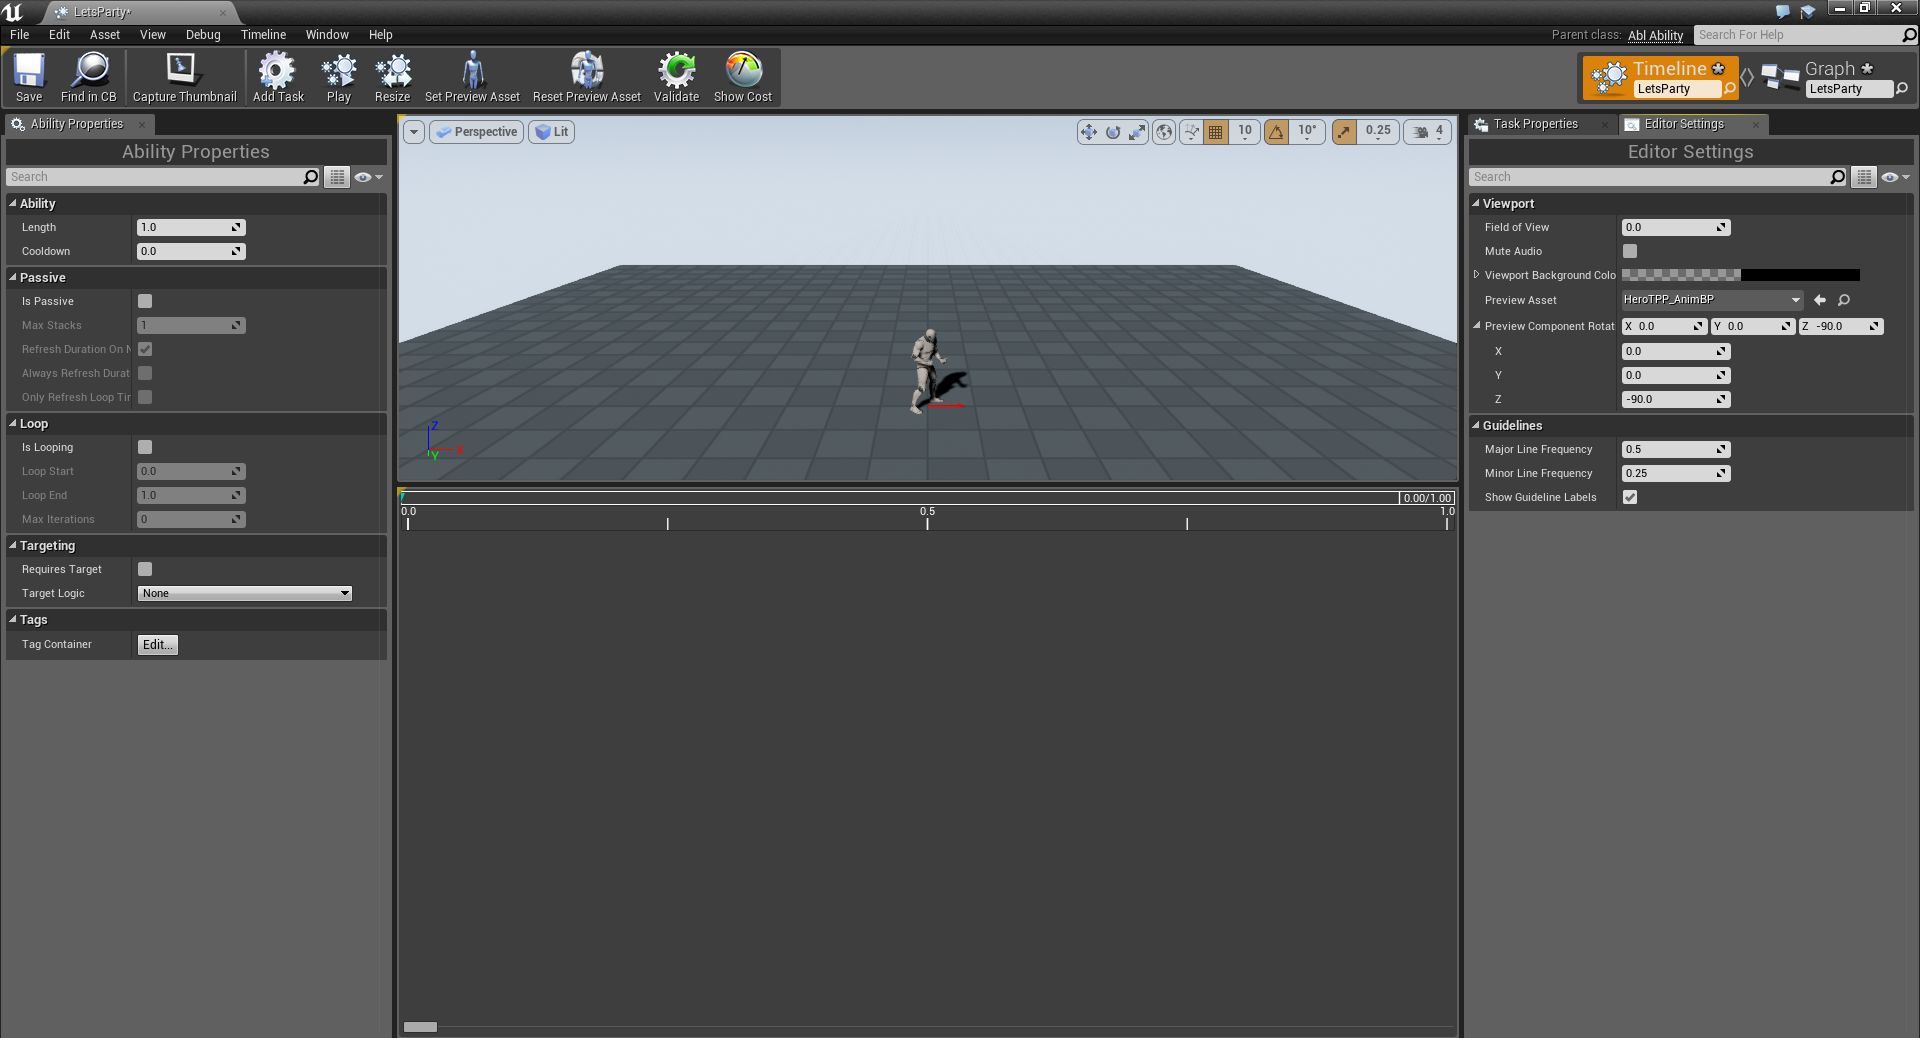
Now, double click on your new Ability and the Ability Editor will automatically open and load up your new Ability.
If this is your first time opening the editor, it will ask you to select an asset to use as the preview asset. In this example, we're using SK_Mannequin which is the default UE4 Mannequin. If your Mannequin isn't facing down the right direction (e.g. the same as the red arrow), you can modify it in the Editor Settings tab as in the screenshot.
If you want, take a second to familiarize yourself with the various properties you have on your Ability (things like Length are very important). You don't need to change anything for this tutorial, but you are more than welcome to play with all the parameters at your leisure.

 Click to enlarge
Abilities are made up of individual actions called Tasks. Right now, our Ability doesn't do anything, but in the end we want our Ability to do two actions: Play a particle effect (our confetti effect), and a sound effect (our party horn sound).
Let's start with adding a Play Particle Effect Task to our Ability. You can right-click on the Task area (the empty space below the preview viewport) and select "Add Task", or simply click the Add Task button on the Toolbar.
Next you'll be presented a window with a number of Tasks to select from. Select the one named "Play Particle Effect" (or simply search for it, then select it) and hit OK.

Click to enlarge

Click to enlarge
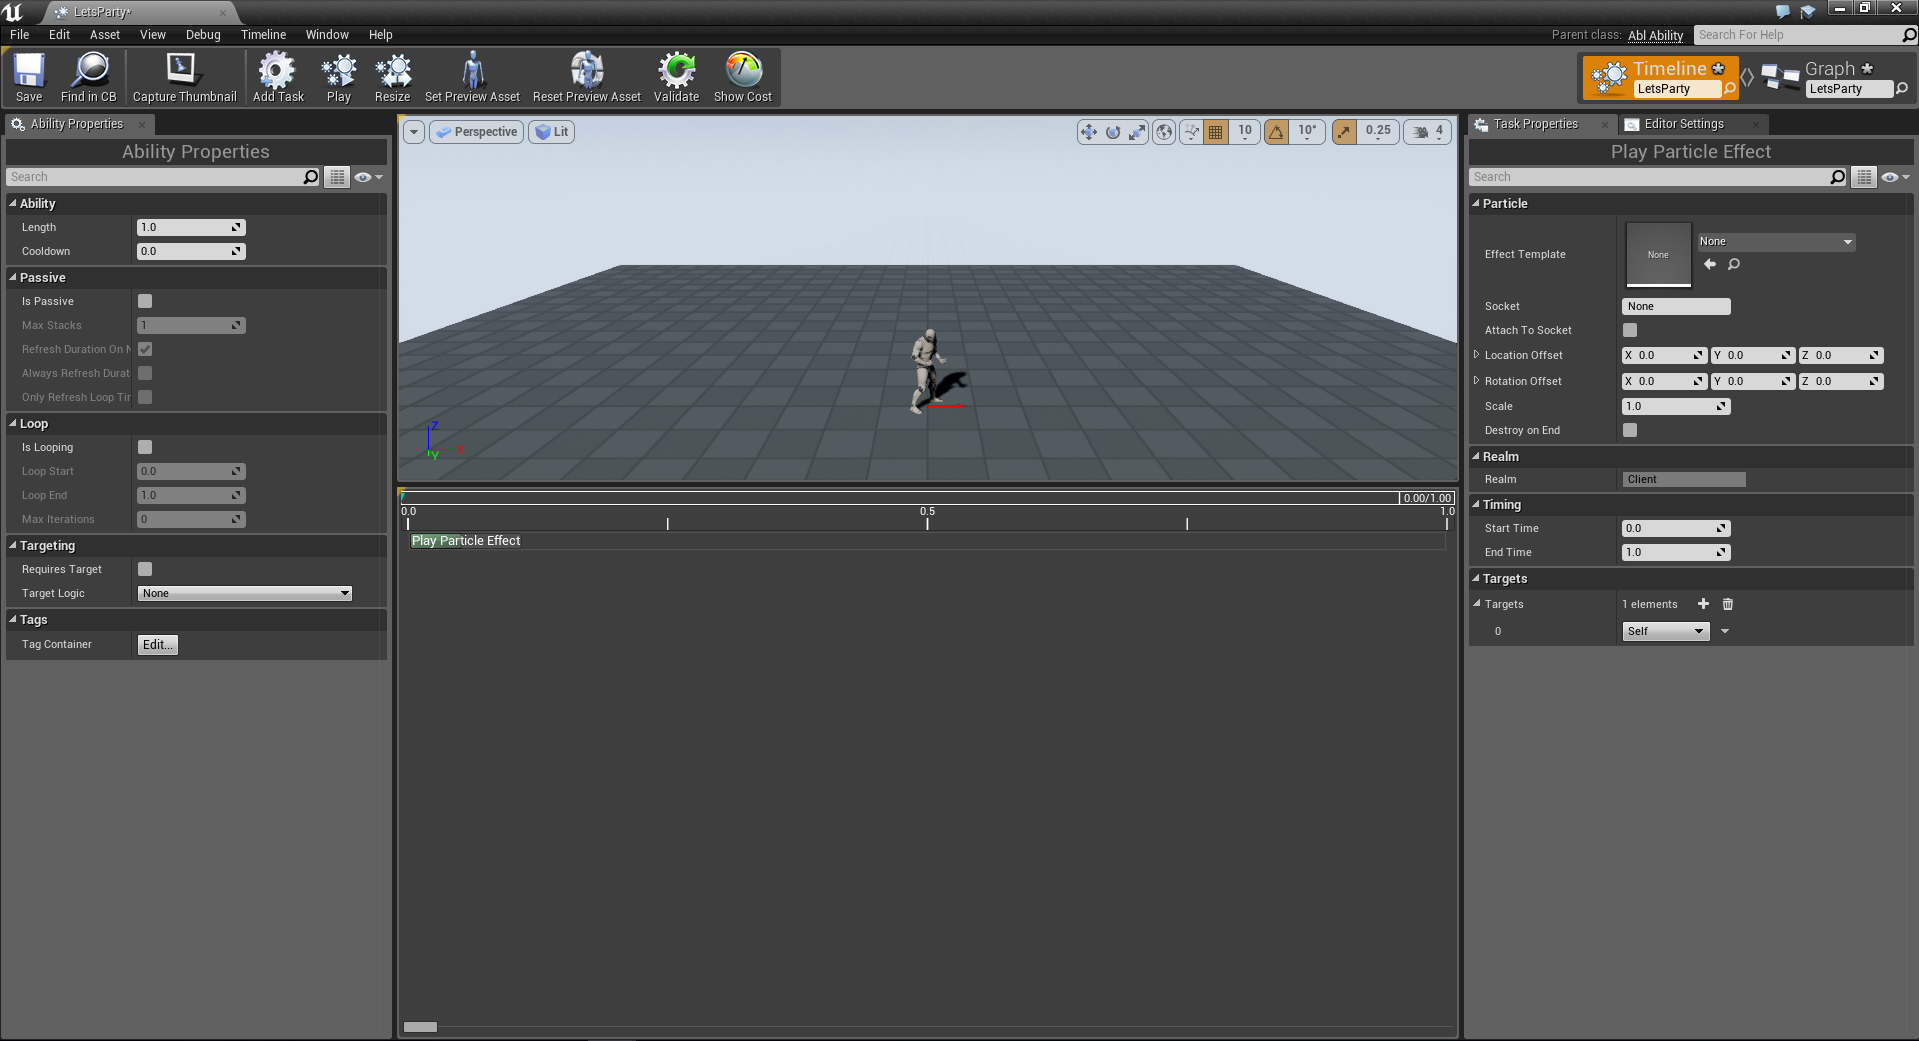
You should now see your new Task on the timeline. Go ahead and click on the task and you'll see all the properties (options) for the Task appear in the Task Properties tab on the right side of the editor.
Now, let's setup our Task to play our confetti effect. To do that we simply:
- Set our Effect Template to PS_Confetti.
- This is the particle effect we'll be playing.
- Set our Socket to head.
- This is the name of a bone to use as the spawn location for our particle effect. This is an optional parameter but it helps things quite a bit in this case.
- Set Destroy On End to true (checked).
- This will cause our particle effect to clean up when our Ability ends. By default, the PS_Confetti effect loops forever, and we don't want to have confetti always following us.
You'll notice when you click Destroy On End the Task grows to match its Start and End times on the timeline. This is because, by default, Play Particle Effect normally only lasts 1 frame - but in this case we need an End Time so we know when to kill our particle effect. If that's a bit confusing, don't worry - you can just ignore it for now.
With your task in place, hit the Play button on the toolbar and you should see confetti fall from above the character's head. If not, check your parameters against the provided screenshot.


Click to enlarge
Now we need to add our 2nd Task, Play Sound.
The only property we need to change on this is to set Sound to our Party_Horn file.
See if you can do it yourself, if you need help you can use the provided screenshot as a cheat sheet.
Again, once you have things set, hit Play on the toolbar and see if everything works as you expect it. With this, our Ability is completed!

 Click to enlarge
Now that our Ability is done, we need to hook it up to an input.
Let's go ahead and add our input action. We could use a raw input, but using an Input Action is good practice as it is what you would use in a game that supports keybinding.
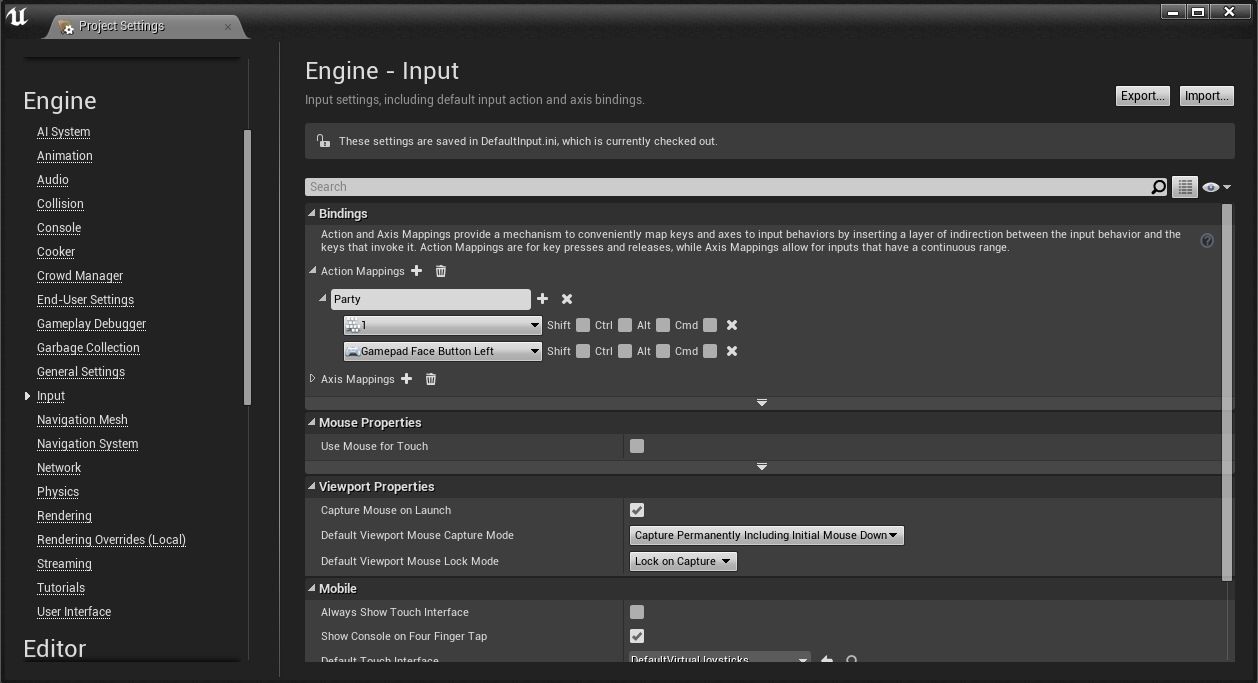
In the Unreal Editor, select Edit > Project Settings...
From there, select the Input category, and under Action Mappings, click + to add a new entry, name it something like Party, and then assign the keys you want to use for this action (in our screenshot we use the 1 key on your keyboard, and the Square/X button on a PS4/Xbox One controller). If you have any questions on Input Actions, see the official documentation.

Click to enlarge
Now, for our Blueprint scripting.
For this example, we've already created a Character Blueprint named "PartyGuy" who will be our character in our level. If you don't have a character to use, the easiest way to add one is to simply create a new Blueprint based on an existing one. In this example, our character is using the UE4_ASPCharacter (which is from Epic's Animation Starter Pack - a free download on the UE4 marketplace) as our Parent class. If you need a refresher on how to create a Blueprint from an existing one, check out the official documentation.
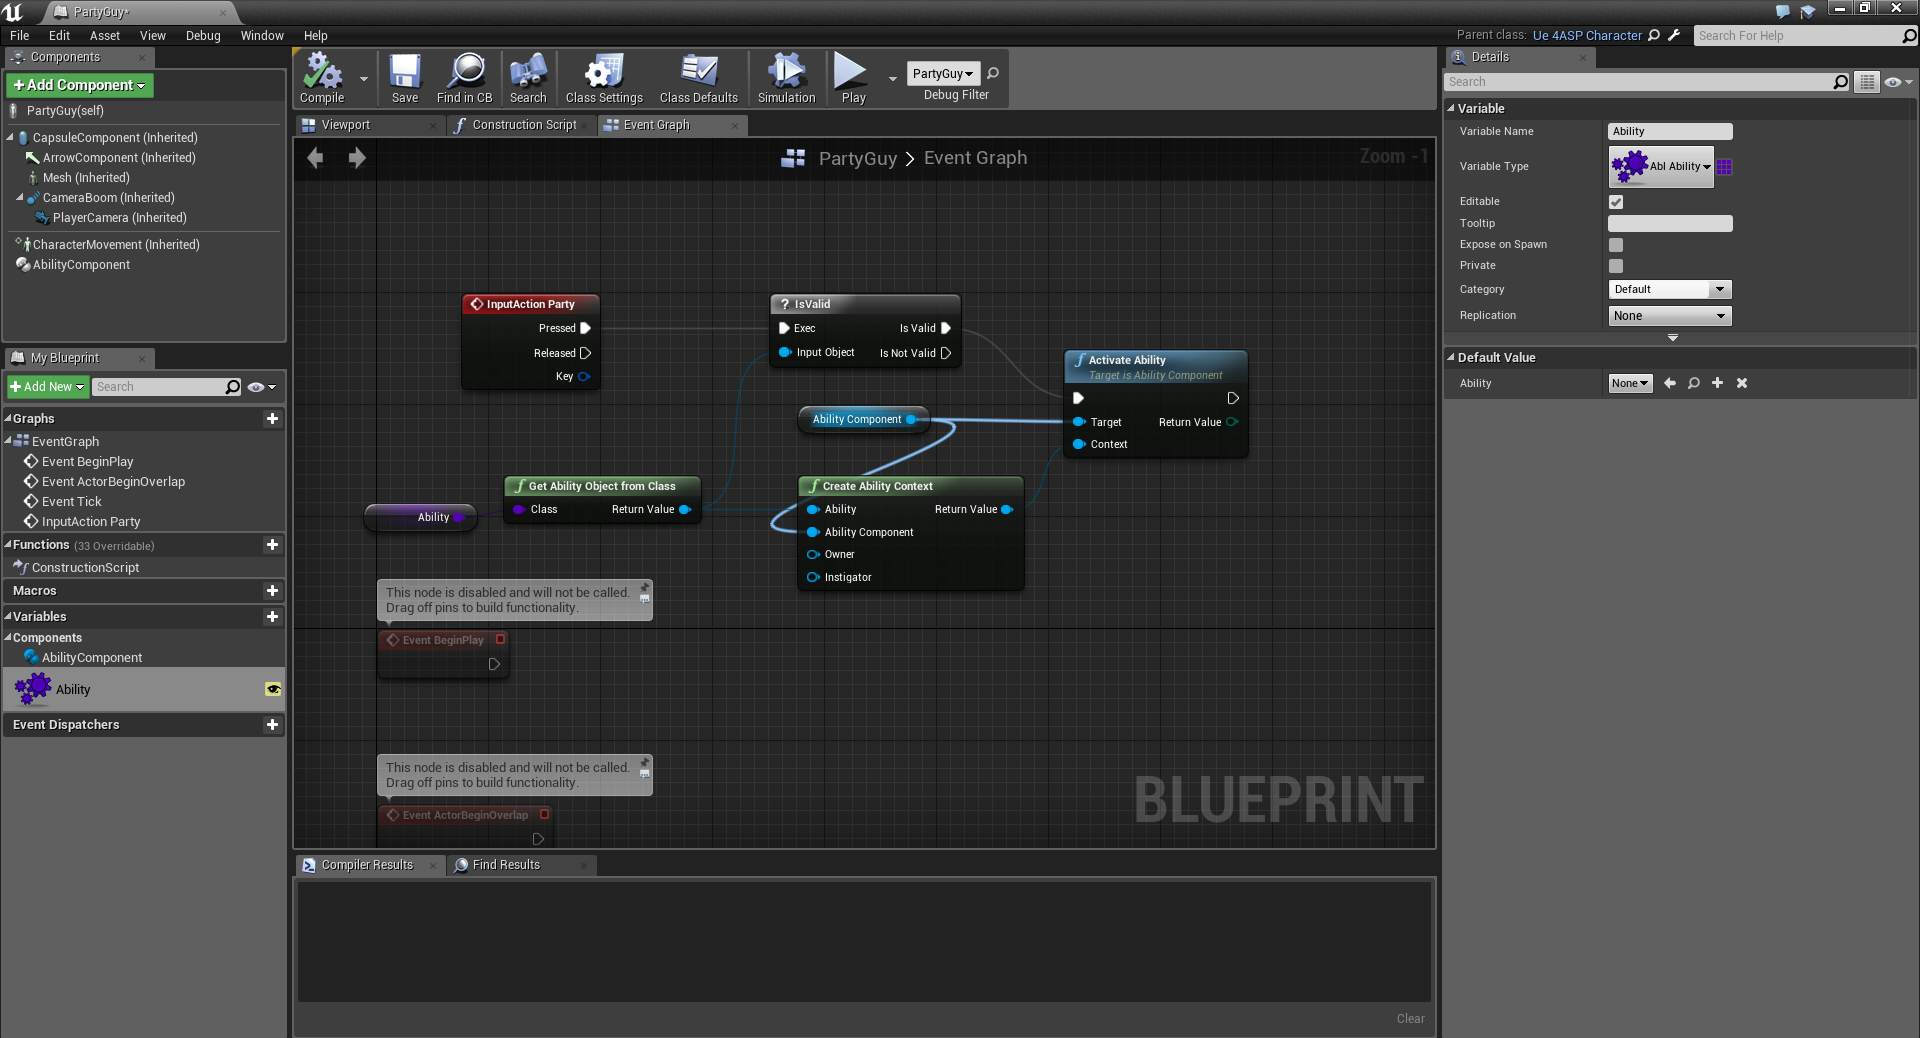
If you're new to Blueprints, this may look confusing but it's actually very simple, so let's take things step by step (if you are familiar with Blueprints, the screenshot has everything you need - but feel free to follow along as well).
- Edit your Character's Blueprint
- First, let's add an Ability Component to our character. Click Add Component and then select Ability Component. Feel free to rename it as well, in this example ours was renamed to Ability Component.
- Next, let's add a new Variable (our type is going to be Object Types > AblAbility >Class), marked it as Editable, and name it something like "Ability".
- We use the AblAbility Class so we'll be able to set this to ANY Ability we want, not just our LetsParty Ability.
- Now, we drag our variable into our Graph, select Get and we're going to drag a connection a method called Get Ability Object From Class. Our Ability is just a Class (an ID), so this method will actually get an instance of our class.
- Click on the Return Value from Get Ability Object From Class and we're going to create two connections:
- IsValid
- This will check that the object returned by Get Ability Object From Class is actually valid and someone didn't set our variable to bad data (like null).
- Create Ability Context
- This will create our Ability Context and will be needed for our next step...
- IsValid
- Drag your Ability Component into the graph, select Get, and drag it to create two connections:
- Plug it into our Ability Component field in our Create Ability Context node. The Ability Component is a required part of the Ability Context.
- Create an Activate Ability node which is a method on our Ability Component.
- Activate Ability takes in an Ability Context, so hook up our Return Value from our Create Ability Context node into that pin.
- Lastly, right click on the Blueprint graph and select the InputAction Party or whatever you named your Input Action in the previous step. Drag a connection from On Pressed to our Is Valid node and finally to our Activate Ability node and you're done! You've created a data driven way to set (and play) any Ability!

 Click to enlarge
Congratulations! You're at the final step! Simply set your Blueprint variable to your LetsParty Ability (or any Ability you want). Play your level and try your new Ability out!